Different ways to add charm to your curb

Paying careful attention to maintaining curb appeal is part of strategic property management nowadays. This effort not only creates a good image for the property owners, but it’s also one of the reliable ways of increasing property market value. It’s worth mentioning as well that a nice exterior space can have a variety of functions to improve home life. Therefore, many New Zealanders today are truly inspired to explore a variety of ways of improving their property’s street appeal.

If you’re among those willing to dedicate time, money and effort to adding charm to your curb, provided below are some of the ways you can easily do so.

  • Add hedging to your exterior space. This can be an improvement to your property’s dimensions; likewise, it can create a clear distinction of where the public property ends and where your private property starts. On top of these, you also score the nice benefit of creating additional shade and privacy for your outdoor space. Jim’s Mowing services include hedging and trimming, so those hedges you introduce to your yard will fully achieve the look and function you have in mind.
  • For a beautifully manicured lawn, nothing beats professional mowing services because expert mowers can really target those edges for the most polished appearance. It’s worth mentioning as well that they know the best grass height that can promote healthy growth throughout the changing seasons.
  • Rubbish removal is also an important effort to make in enhancing the look of your curb. Nothing can ruin the beauty of outdoor space more than piles of rubbish such as trimmings, fallen leaves, dead branches, and obviously wilted plants. Professional lawn services will take care of clean-up for you, not only to restore the nice appearance of your yard, but also to prevent pests like mice and other rodents from becoming attracted to your property’s outdoor space.
  • Introducing new plants, particularly flowering ones, is another smart thing to do for improved curb appeal. There’s nothing like the look of health that blossoming flowers create. If you will plant species endemic to your location, you won’t have to worry much about maintenance because they will naturally thrive in your local climate. If you wish to ensure the healthy look of your curb with a voluminous growth of plants, flowers and trees, the gardening pros at Jim’s Mowing can definitely lend their expertise so you can grow and maintain an abundant garden easily.

If you lack the green thumb or simply don’t have the time, call the professionals at Jim’s mowing on 0800 454 654 or book online for a free, no obligation quote!

The 5 best landscaping ideas for small backyards

Today, even a small backyard can look and feel spacious if it is designed the right way. With the right landscaping ideas and steps, you can have an aesthetically appealing lawn and still have enough functional space for the family to enjoy.

To get on the right track to having a beautiful landscaped small backyard, here are five ideas and tips that can help you out:


  1. Create a feasible plan.

Organisation is the operative word when making a plan for a small landscaped yard. Start by thinking about the primary use of the backyard. You can then select a theme and also come up with a budget. It would also work to your advantage if you define the spaces in your small yard and make sure you know their specific purposes.

For example, you can delineate a dining or lounging area with a stone patio and separate the play area from this spot with some plantings.


  1. Select the right plants.

When planning your landscape, it’s best to cultivate native or indigenous plants since you can be sure that there is always something growing in the yard year-round. In case you want to have some trees on your yard, select ones that grow up instead of out. Tall and thin trees will give you lush landscaping without eating up all your space.


  1. Be creative.

To maximise a small space for a landscape, you have to think outside the box. Consider having terraced landscaping since this helps designate spaces and make a small yard look bigger. Terracing can also enable you have to more space for plantings and the lower walls can double as bench seatings.

Another good idea would be to have a trellis built above which you can cover with native vines. This trellis will define your patio space and provide shade.


  1. Put multifunctional features.

When you’re deciding on features to place in your yard, opt for items that have multiple uses and are not too bulky. An example of this is a bench that can double as a storage box to contain garden tools. You will also do well to choose pieces of furniture that can be easily stored such as collapsible tables and folding chairs.


  1. Enhance your fence.

Lastly, if your yard is surrounded by fences, make them more appealing by painting them or adorning them with decorative items. Plain white fences can you give the sense of enclosure, but decorating them will provide anyone looking at them a sense of depth. An adorning tip you can consider is to attach planters to the fence to add more greenery in the yard.


Space is your biggest concern when landscaping a small back yard. But with the right ideas, techniques, and tips, you can have a well-designed, attractive and functional yard.


Top 3 landscaping ideas for large backyards

Whenever you look at your huge, empty backyard, in your mind, you can probably hear it begging to be landscaped. Although a huge outdoor space can be great as a personal recreational area for kids and teens, you will still get more out of it and get your property looking better if you have it landscaped.

Landscaping a huge backyard however, doesn’t simply entail planting some seeds in certain areas and waiting for them to grow, and putting in some pieces of outdoor furniture. Here are some of the best landscaping ideas and strategies that will
work well for you and your property if you’re designing a large backyard.

  1. When coming up with a design, use zones.

The final landscape design of an expansive yard can lack focus if you don’t divide it into specific sectors. When coming up with the plan, consider each area as an outdoor room and use its function to define its design. If you want to have an outdoor kitchen or dining area, make sure the designated spot has a grill, patio table, and chairs. Its layout should make it easily noticeable that it is an outdoor kitchen and dining area.

If you want to have a quiet place to relax outdoors, consider allocating an area for installing a water feature, a shade, and some comfy chairs where you can read a book or even meditate.  When planning these rooms, don’t forget to leave a portion of the yard open for your kids to play. Make sure it will be spacious enough to hold a trampoline and some outdoor play equipment.


  1. Opt for a curvilinear design.

Different landscape styles can work for large backyards. However, a curvilinear design can be truly appealing since it effortlessly simulates a natural look thanks to its use of the curved boundary lines that follow the contours of your yard. Properties standing on rolling terrains can also benefit greatly from this landscape style since the curved lines can highlight changes in grade and successfully incorporate them into the design.

A curvilinear design will enable you to take advantage of your yard’s views on all sides since it is supposed to blend with your outdoor space’s natural curves instead of trying to create a new yet conventional rectilinear shape.


  1. Layer the plants.

Lastly, by layering your plants, you will be able to give your huge backyard and landscape additional texture and an appealing look. To achieve this look, place or cultivate tall plants along the edges of your yard. It would work to your advantage to plant native, hardy trees.

In the middle and front, plant bold, colourful shrubs such as native species of grevilleas, honey myrtles, and bottlebrushes. Just make sure you layer them so that the smaller varieties of bushes are in front.


A huge backyard can be the complete, perfect outdoor space for everyone, and for different purposes. This can be achieved effortlessly if it has the right landscape design.


7 household products that kill and control weeds

We’ve seen it too many times, beautiful flowers trying to grow and pesky weeds coming along and destroying the beauty with their uncontrollable hunger for destruction. Luckily, you don’t have to spend a lot of money on weed control. These are 7 household products you can use to kill or control weeds in your garden.

  1. Shower curtains. Next time you splurge for a new shower curtain, don’t just throw your old one out, use it to control weeds in your backyard! Simply place the shower curtain under mulch to prevent weeds from growing through.
  2. After you throw your next party and have an extra half of bottle of vodka laying around, try using it to kill weeds. Mix 1 oz Vodka with a couple of drops of dish soap and 2 cups water in a small spray bottle and spray the mixture directly on to the weed leaves until it runs off. Do this when it’s sunny, because the purpose of the mix is to dehydrate the weeds in sunlight and it may not be as effective in the shade.
  3. Bleach is too harsh for your garden, but if you have weeds growing up through cracks in footpaths or walkways, you can try pouring just a bit of bleach directly on to them to kill the weeds.
  4. Salt is another household item that is great for ridding your footpath of the pesky weeds that pop up in between cracks, it always works great to kill unwanted grass that springs up. Boil 2 cups water mixed with 1 cup of salt and pour the boiling mix directly on the weeds.
  5. Carpet pieces.If you’ve just redone your carpet and have some scraps laying around, use them under straw or mulch in your garden for a weed-less path. Place the scraps upside down under mulch. You can also use the smallest pieces for actual mulch in a veggie garden.
  6. Baking soda.As if this miracle product didn’t already have enough uses, now we know we can use it for a safe, effective way of controlling weeds. Sprinkle baking soda by the handful onto concrete and sweep into cracks where weeds are growing. The powder will make it much drier and harder for the weeds to grow, basically snuffing them out.
  7. 2-litre bottles.If you do choose to use herbicides, try using bottles to make a more controlled application. Single out the weed you want to kill and cut a 2-liter bottle in half, place the upper half of the bottle over the weed. Aim the wand in to the opening of the bottle and spray. Doing this protects all of the plants you DON’T want to harm while you’re spraying.

Call Jim’s Mowing on 0800 454654 for all of your gardening needs or simply book online for a free, no-obligation quote!


Herb Gardening In Unique Ways


Jim's Mowing New Zealand - Herb Gardening

Growing herbs in your property offers plenty of benefits. If they are portable, you can easily find their preferred shade and sun locations. Also, you can conveniently keep them in the kitchen for cooking. Most importantly, herbs are excellent edible works of art. Herb gardening in unique ways allows homeowners to easily grow their own herbs.

4 Creative Ways to Grow Herbs

  1. Pallet Herb Garden

Prior to planting herbs in a pallet, you must make sure that the wood is food-safe. Pallets have stamps on them which indicate how they were treated. Know that the stamps vary by county; thus, you must examine your pallet carefully and look up the code.

  1. Potted Herb Garden

You can use plastic flower pots, baskets, barrels, wooden boxes, and any container that is at least 15cm big. It is crucial for you to create holes in the container’s bottom for easy and proper drainage.

Clean the containers before filling them with nutrient-rich, organic, and fresh potting soil. If you are to use nursery plants that are root bound, loosen the roots at the bottom of the soil and set them slightly deeper than when they were in the nursery pots. Lastly, water them thoroughly.

Jim's Mowing New Zealand - Herb Gardening

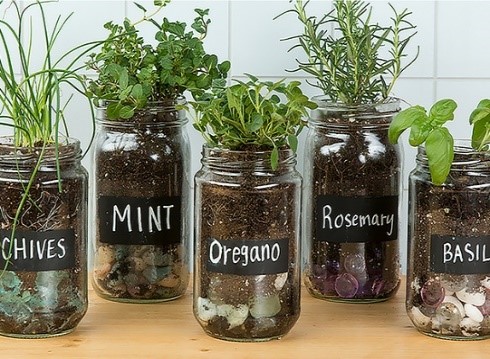
  1. Mason Jar Herb GardenJim's Mowing New Zealand - Herb Gardening

Recycle your jars and place them on a pallet. You can also use a piece of wood and hang them in your favourite space at home. This is one of the best ideas to try if you want to watch your herbs grow before your eyes.

Fill the jars ¾ full with high quality organic potting soil. Add seeds to every jar. Be sure to always follow the planting instructions. Cover the seeds with more potting soil. Lastly, water them properly. Don’t forget to place identification tags on every Mason jar.

4 .Self-Watering Herb Planters

Jim's Mowing New Zealand - Herb Gardening

If you are wondering what you can do with all those empty wine bottles, consider creating self-watering herb planters. But before that, you need to learn how to correctly cut wine glasses. And among the easiest ways of cutting the bottles is with the use of a bottle cutter.

When the bottles have been cut, it is time to plant. Layer the herbs up as you would do with other plants. You can add some stones at the base of the bottle’s neck for drainage. To hold the soil, add some dirt. Make sure to pop the herbs in a sunny position.

Growing your own herbs is the best way to avoid having the leftover herbs slowly wilt and end up in compost bins. The good news is that growing herbs in a small space is easier than you think. In Australia, some of the herbs you can easily grow at home will include mint, parsley, rosemary, thyme, and basil.

Jim's Mowing New Zealand - Herb Gardening

For all of your gardening requirements, call Jim’s Mowing on 0800 454 654 or Book Online for your free, no-obligation quote today!

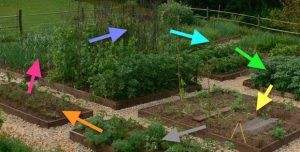
Crop Rotation For Growing Veggies

Simple and Practical Crop RotationJim's Mowing New Zealand - Vegetable Crop Rotation

Crop rotation is extremely beneficial for not only your crops, but also to aid in building and maintaining healthy soil, to minimise pests and diseases, reduce chemical use, and manage nutrient requirements – all which will maximise your harvest. The ideologies of crop rotation have been successfully used for thousands of years in farming and are still used today. The simplicity of crop rotation allows the practice to be used in your own vegetable gardens with great success.

Crop rotation is self-explanatory – simply rotating your crops, so that no garden bed or plot grows the same crop in consecutive seasons. Doing so;

  • Decreases the build-up of pests and diseases in the soil by confiscating their preferred habitat and therefore breaking the pest or disease’s life cycle, reducing and even eliminating your necessity for chemical spraying.
  • Achieves the necessary soil pH and nutrient levels, to help your vegetables get the maximum supplements out of your soil. The use of composts, manures, lime and fertilisers at the correct times will also assist in producing successful crops.

Jim's Mowing New Zealand - Vegetable Crop Rotation

To Begin with;

Just contemplate vegetables in terms of their family names. For example, in succeeding years or seasons, you do not want to plant Broccoli, which is a member of the Brassicaceae family in the same garden bed. The Brassicaceae family has many other members such as Cauliflower, Kohlrabi, Cabbage and are all affected by the same pests and diseases. So we group them together (Brassicaceae) and rotate them to another bed that hasn’t seen Brassica for a couple of years. We group certain plants together and they are rotated as a group. For instance, beans and peas are both in the Legume group, and garlic and onions are in the Allium group. With a just little preparation you will have your crop rotation structure organised in no time.

The Next Level;

Advanced gardeners should be thinking about the way plants feed or draw nutrients from the soil, for example; The Brassicaceae family (Cauliflower, Broccoli, Cabbage, etc.) require plenty of nitrogen for good leaf growth and are commonly considered substantial feeders. A crop to follow nitrogen ravenous Brassicas may be legumes such as peas, beans, and lentils. Legumes feed lightly and have the ability to ‘fix’ nitrogen into soils, improving the nitrogen content for impending plantings. Tomatoes and capsicums (acid lovers) like a lower pH, and the pH generally drops (becomes more acidic) as more compost and manure is added to soil, therefor lime should be applied after they are finished, ready for a crop that enjoys a higher pH level.

Example of a Simple Rotation Plan

Crop assemblies in a four-year rotation would be as follows;

Legumes & Pod Crops                                Brassicas & Leaf Vegetables Alliums Other (Root and Fruiting Crops)
Okra Broad Beans Onions (All types) Tomatoes
Runner Beans Kales Shallots Capsicums
Lima Beans Cauliflowers Chives Celery
Peas Cabbages Leeks Beetroot
Brussels Sprouts Garlic Salsify
Mustard Greens Parsnips
Pak Choi Carrots
Swedes & other Turnips Potatoes
Radishes Sweet Potatoes
Silverbeet Corn
Spinach


A yearly rotation schedule would look something like this.

Jim's Mowing New Zealand - Vegetable Crop Rotation

Plot 1 Plot 2 Plot 3 Plot 4
Year 1 Brassicas Other Alliums Legumes
Year 2 Legumes Brassicas Other Alliums
Year 3 Alliums Legumes Brassicas Other
Year 4 Other Alliums Legumes Brassicas


These examples may be used in your garden although everyone’s soil, climate and tastes vary so a little alteration will most probably be required. There are many approaches to crop rotation, some are simple like the one above but others can get relatively complex, some even include a ‘fallow year’, which is a year where nothing is grown in that specific plot.

Even if you decide to integrate other vegetables or methods, just remember the most basic rule for the best possible harvest is Annual Crop Rotation!

Jim’s mowing offers a huge range of gardening services and maintenance beyond just mowing, so if we can help at all give us a call on 0800 454 654 or Book Online and we might just surprise you!

5 Tips Every Good Gardener Needs To Know

New gardening techniques, tips, products, tools, and equipment are introduced on a regular basis. Although many of these have been proven to be effective, you can be sure that you will have a healthy, lush lawn by knowing and applying the basic yet most helpful gardening tips and tricks.

Jim's Mowing New Zealand - Gardening Tips

Here are five simple and effective tricks and tips every good gardener needs to know about:

  1. Make sure your soil is conducive for growing plants.For your plants to grow and thrive, your soil must have the right pH level and the right amount
  2. Jim's Mowing New Zealand - Gardening Tipsand quality of micro-nutrients. You can use a soil testing kit which you can buy at gardening stores to do this, or send it to a company that offers this service. If you are already certain that you have the ideal soil, you can help make it even more nutrient-rich and “friendlier” by adding compost, manure or dried peat moss. Keep in mind that amended soil is lighter, drains well, allows roots to establish themselves quicker, and makes for easy weeding.
  3. Water deeply and in the morning.By watering deeply, you ensure that the plants’ deep roots get enough water which they need for healthy growth. Also, always water your plants in the morning to avoid quick water loss from evaporation. In addition, when you water early in the morning, you ensure that the plant’s leaves dry up before evening, which helps restrict the development of fungus and mealybugs.Jim's Mowing New Zealand - Gardening Tips
  4. Control the weeds.Cudweed, dandelion, clover, and creeping oxalis are some of the most common invasive weeds you can find in New Zealand. To prevent any of these weeds from invading your garden, whenever you see one, pull it out from the moist soil so that you can be sure you remove the whole plant, including its roots. If you already have a weed invasion, cover the weeds with black plastic, tarpaulin, or newspapers for at least 15 days so that they don’t get any sun light and eventually die.
  5. Prune regularly.Trimming a plant makes it healthier and controllable. In addition, you can give it the shape you want. You don’t have to use a motor-powered tool every time you trim; removing a few centimetres off the plant, which is called pinch pruning, can do wonders for your plants.Jim's Mowing New Zealand - Gardening Tips
  6. Keep your garden pest-free.Lastly, although small, caterpillar worms, beetles, slugs, and aphids can easily and quickly destroy your precious plants. Some simple DIY pest control tips include placing saucers of beer around as bait for slugs and snails and applying crushed tomato leaf or garlic spray on stems and leaves to control aphids.

Jim's Mowing New Zealand - Gardening Tips

Whether you’re a beginner or already a pro at gardening, sticking to tried-and-tested techniques and tips and trying new proven effective hacks and tricks can help you get the healthy, lush garden you’ve always wanted.

For all of your gardening requirements, call Jim’s Mowing on 0800 454 654 or Book Online for your free, no-obligation quote today!

Roses

Caring for Roses – Jim’s Mowing  – 0800 454 654 or book online!Jim's Mowing New Zealand - Rose Care

Instructions

Winter is the best time to plant roses and is also the correct time to prune, mulch and spray but they also do just fine when planted in spring.

Planting

If you plant your rose bushes right, it will be a lot easier to keep them healthy, strong and full of flowers.

Roses like a lot of sunlight so choose a sunny spot – somewhere that gets at about 5 hours a day is best. Also try to pick a spot sheltered from strong winds.

Next, prepare your soil. Dig it through using a garden fork and remove any weeds. Add plenty of peat, compost or any well-rotted organic material to give the soil a nutrient boost.

Now dig a hole big enough to hold the roots and create a small mound of soil (around 5cm high) in the centre of the hole. Carefully squeeze out your rose bush from its pot and place on top of the mound. Check that where the roots and stem meet is level with the top of the hole – if it isn’t you may need to adjust the size of your mound. Then spread out the roots around the mound.

Fill in the hole, firm the soil and water well.

Add a layer of mulch around the rose bush to help prevent weeds from growing and to help retain water. Just make sure that mulch doesn’t touch the stem of the bush as if it does it can cause it to rot.

Pruning

Prune roses when they are not in flower. This is generally aroJim's Mowing New Zealand - Rose Garden Careund June or July although in cooler regions, it may be more like August. Don’t be concerned if you still have a few roses flowering when it is time to prune. A few flowers are an acceptable sacrifice to ensure a good performance next year.

Choose a sunny dry day to prune, as wet weather can encourage the spread of disease.

Always use sharp secateurs to get a clean cut. A clean cut prevents die back and bacterial disease from affecting roses. TOP TIP Dip secateurs in bleach or methylated spirit to reduce the chances of spreading disease.

To prune, first remove any dead or diseased growth and then clear the centre of the plant to allow air movement. Cut branches back by about half and make all cuts on an angle which slopes away from the bud

HANDY HINT:
Keep your garden bag handy to collect all the cuttings and debris that falls on the ground. You should dispose of this to stop the spread disease rather than putting into your compost bin if you have one.

Watering and FeedingJim's Mowing - Rose Care

Roses do not need watering or feeding in winter as they are dormant and not growing but they do require plenty of water in summer. Consider installing an irrigation system to make sure your roses get the regular, deep watering they need

When buds start to burst in early spring start feeding them approximately once a month with a balanced fertiliser specially blended for roses.

Roses do well with cool, moist, rich soils, and do not like competing with weeds for food and water so continue to add a layer of mulch around the stem.

Spraying

To keep roses pest and disease free many gardeners regularly spray them. Winter is a good time for spraying to catch any over-wintering insect eggs or fungal spores. A copper based spray is a good general clean up spray to apply. Talk to a team member in store for specific advice on different sprays available or alternative options for dealing with pests and disease.

HANDY HINT:
There are lots rose varieties available. Consider colour, planting location and climate and scent when choosing. Talk to one of our friendly team members in store for advice on the best variety for you.

For all of your gardening and landscaping needs call Jim’s Mowing on 0800 454 654 or book online today!