Fertilising Basics
 How-tos : Fertilisation for Established Plants
Established plants can benefit from fertilisation. Take a visual inventory of your landscape. Trees need to be fertilised every few years. Shrubs and other plants in the landscape can be fertilised yearly. A soil test can determine existing nutrient levels in the soil. If one or more nutrients is low, a specific instead of an all-purpose fertiliser may be required. Fertilisers that are high in N, nitrogen, will promote green leafy growth. Excess nitrogen in the soil can cause excessive vegetative growth on plants at the expense of flower bud development. It is best to avoid fertilising late in the growing season. Applications made at that time can force lush, vegetative growth that will not have a chance to harden off before the onset of cold weather.
Light
Conditions : Partial Shade 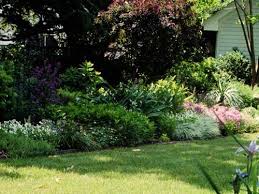
Partial Shade is defined as filtered light found beneath trees with high limbs. Partial shade usually offers some protection from direct afternoon sun.
Watering
Tools : Watering Aides
No gardener depends 100% on natural rainfall. Even the most water conscious garden appreciates the proper hose, watering can or wand.
Watering Cans: Whether you choose plastic of galvanized makes no difference, but do look for generous capacity and a design that is balanced when filled with water. A 2 gallon can (which holds 18 lbs. of water) is preferred by most gardeners and is best suited for outdoor use. Indoor cans should be relatively smaller with narrower spouts and roses (the filter head).
Watering Hose: When purchasing a hose, look for one that is double-walled, as it will resist kinking. Quick coupler links are nice to have on ends of hoses to make altering length fast. To extend the life of your hose, keep it wound around a reel and stored in a shady area. Prior to winter freezes, drain hose.
Sprayers: Are commonly thought of as devices for applying chemicals, but can really be a step saver for watering houseplants or small pots of annuals rather that dragging out a hose or making numerous trips with a watering can. The backpack sprayer is best suited for this. Take care not to use any kind of chemical in tanks used for watering!
Sprinklers: Attached to the ends of garden hoses, these act as an economical irrigation system. Standing Spike Sprinklers are usually intended for lawns and deliver water in a circular pattern. Rotating Sprinklers deliver a circle of water and are perfect for lawns, shrubs and flower beds. Pulse-jet sprinklers cover large areas of ground in a pulsating, circular pattern. The head usually sits up on a tall stem, except for when watering lawns. Oscillating sprinklers are best for watering at ground level in a rectangular pattern.

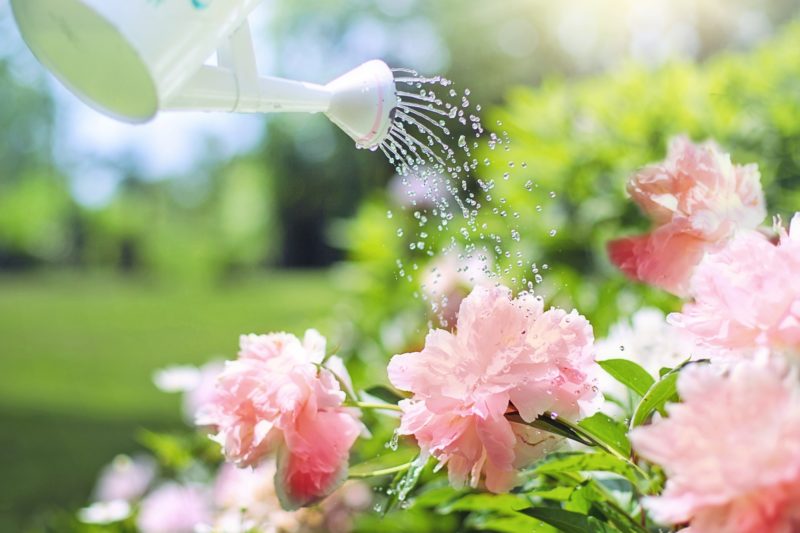

Conditions : Normal Watering for Houseplants
Houseplants that require normal watering should be watered so that soil is completely saturated and excess water runs out the bottom of the pot. Never water just a little bit; this allows mineral salts to build up in the soil. The key to normal watering is to allow the top inch or two of potting soil to dry out between waterings. Check frequently as certain times of the year may dictate that you water more frequently. Also, some plants that require normal watering during the growing season, may require less during the winter months when they are dormant.
Conditions : Regular Moisture for Outdoor Plants
Water when normal rainfall does not provide the preferred 1 inch of moisture most plants prefer. Average water is needed during the growing season, but take care not to overwater. The first two years after a plant is installed, regular watering is important. The first year is critical. It is better to water once a week and water deeply, than to water frequently for a few minutes.
Conditions : Moist and Well Drained
Moist and well drained means exactly what it sounds like. Soil is moist without being soggy because the texture of the soil allows excess moisture to drain away. Most plants like about 1 inch of water per week. Amending your soil with compost will help improve texture and water holding or draining capacity. A 3 inch layer of mulch will help to maintain soil moisture and studies have shown that mulched plants grow faster than non-mulched plants.
Conditions : Indoor Watering
Plant are composed of almost 90% water so it important to supply them with adequate water. Proper watering is essential for good plant health. When there is not enough water, roots will wither and the plant will wilt. When too much water is applied too frequently, roots are deprived of oxygen and diseases occur such as root and stem rots.
The type of plant, plant age, light level, soil type and container size all will impact when a plant needs to be watered. Follow these tips to ensure successful watering:
* The key to watering is frequency. Water well then wait long enough until the plant needs to be re-watered according to its moisture requirements.
* When watering, water well. That is, provide enough water to thoroughly saturate the root ball. With containerised plants, apply enough water to allow water to flow through the drainage holes.
* Avoid using cold water especially with houseplants. This can shock tender roots. Fill watering can with tepid water or allow cold water to sit for a while to come to room temperature before watering. This is a good way to allow any harmful chlorine in the water to evaporate before being used.
* Some plants are best irrigated by sub-irrigation, i.e. watering from the bottom up. This avoids splashing water on the leaves of sensitive plants. Simply place the pot in a shallow pan filled with tepid water and let the plant sit for 15 minutes to allow the root ball to be thoroughly wet. Take out and allow sufficient drainage.
* Use an unpainted dowel to help you determine when to re-water larger pots. Stick it into the soil ball & wait 5 minutes. The dowel will absorb moisture from the soil and turn a darker color. Pull it out and examine. This will give you an idea of how wet the soil root ball is.
* Roots need oxygen to breath, do not allow plants to sit in a saucer filled with water. This will only promote disease.
Planting
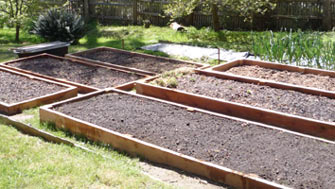 How-tos : Preparing Garden Beds
Use a soil testing kit to determine the acidity or alkalinity of the soil before beginning any garden bed preparation. This will help you determine which plants are best suited for your site. Check soil drainage and correct drainage where standing water remains. Clear weeds and debris from planting areas and continue to remove weeds as soon as they come up.
A week to 10 days before planting, add 2 to 4 inches of aged manure or compost and work into the planting site to improve fertility and increase water retention and drainage. If soil composition is weak, a layer of topsoil should be considered as well. No matter if your soil is sand or clay, it can be improved by adding the same thing: organic matter. The more, the better; work deep into the soil. Prepare beds to an 18 inch deep for perennials. This will seem like a tremendous amount of work now, but will greatly pay off later. Besides, this is not something that is easily done later, once plants have been established.
 How-tos : Pruning Trees After Planting
It is critical to prune trees correctly from the beginning to assure proper growth and development. Young trees can be transplanted in a number of forms: bare root, balled & burlap and in containers. The more stress the plant undergoes in the transplant process, the more pruning that is required to compensate.
Deciduous trees like maples (those that loose their leaves in the fall) can be dug up and sold with their bare roots exposed. Because most of the root system is lost in digging, sufficient top growth should be removed to compensate for this loss. This may be done at the nursery before you buy the plant or you may have to prune at the time of planting. Select and head back the best scaffold branches, i.e. those branches which will form the main lateral structure of the future mature tree. Remove all other extraneous side branches. If the tree seedling does not have branches, allow it to grow to the desired height of branching then pinch it back to stimulate the lower buds to form branches.
Ball and burlap trees are dug up with their root systems somewhat intact. This was mostly done for conifers and broadleaf evergreens, but has become common for deciduous trees as well. Since some root mass is lost in the digging stage, a light pruning is generally called for. Head back the plant to compensate for this loss and to promote branching.
Trees that are grown in containers generally do not loose roots in the transplanting phase. Therefore you do not generally have to prune them unless there is some root injury or limb damage in the planting process.
Once you have your trees planted, be patient. Do not remove shoots from the trunk early on as these allow the tree to grow more rapidly and also shade the tender young trunk from sun-scald. Wait a few years to begin training the tree to its ultimate form.
How-tos : Preparing Containers 
Containers are excellent when used as an ornamental feature, a planting option when there is little or no soil to plant in, or for plants that require a soil type not found in the garden or when soil drainage in the garden is inferior. If growing more than one plant in a container, make sure that all have similar cultural requirements. Choose a container that is deep and large enough to allow root development and growth as well as proportional balance between the fully developed plant and the container. Plant large containers in the place you intend them to stay. All containers should have drainage holes. A mesh screen, broken clay pot pieces(crock) or a paper coffee filter placed over the hole will keep soil from washing out. The potting soil you select should be an appropriate mix for the plants you have chosen. Quality soils (or soil-less medias) absorb moisture readily and evenly when wet. If water runs off soil upon initial wetting, this is an indicator that your soil may not be as good as you think.
Prior to filling a container with soil, wet potting soil in the bag or place in a tub or wheelbarrow so that it is evenly moist. Fill container about halfway full or to a level that will allow plants, when planted, to be just below the rim of the pot. Rootballs should be level with soil line when project is complete. Water well.
How-tos : Planting a Tree 
Dig out an area for the tree that is about 3 or 4 times the diameter of the container or rootball and the same depth as the container or rootball. Use a pitchfork or shovel to scarify the sides of the hole.
If container-grown, lay the tree on its side and remove the container. Loosen the roots around the edges without breaking up the root ball too much. Position tree in center of hole so that the best side faces forward. You are ready to begin filling in with soil.
If planting a balled and burlaped tree, position it in hole so that the best side faces forward. Untie or remove nails from burlap at top of ball and pull burlap back, so it does not stick out of hole when soil is replaced. Synthetic burlap should be removed as it will not decompose like natural burlap. Larger trees often come in wire baskets. Plant as you would a b&b plant, but cut as much of the wire away as possible without actually removing the basket. Chances are, you would do more damage to the rootball by removing the basket. Simply cut away wires to leave several large openings for roots.
Fill both holes with soil the same way. Never amend with less than half original soil. Recent studies show that if your soil is loose enough, you are better off adding little or no soil amendments.
Create a water ring around the outer edge of the hole. Not only will this conserve water, but will direct moisture to perimeter roots, encouraging outer growth. Once tree is established, water ring may be leveled. Studies show that mulched trees grow faster than those unmulched, so add a 3″” layer of pinestraw, compost, or pulverized bark over backfilled area. Remove any damaged limbs.
Problems
Pest : Spider Mites
Spider mites are small, 8 legged, spider-like creatures which thrive in hot, dry conditions (like heated houses). Spider mites feed with piercing mouth parts, which cause plants to appear yellow and stippled. Leaf drop and plant death can occur with heavy infestations. Spider mites can multiply quickly, as a female can lay up to 200 eggs in a life span of 30 days. They also produce a web which can cover infested leaves and flowers.
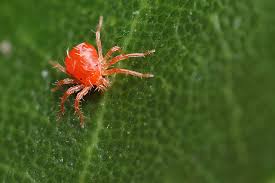

Prevention and Control: Keep weeds down and remove infested plants. Dry air seems to worsen the problem, so make sure plants are regularly watered, especially those preferring high humidity such as tropicals, citrus, or tomatoes. Always check new plants prior to bringing them home from the garden center or nursery. Take advantage of natural enemies such as ladybug larvae. If a miticide is recommended by your local garden center professional or county Cooperative Extension office, read and follow all label directions. Concentrate your efforts on the undersides of the leaves as that is where spider mites generally live.
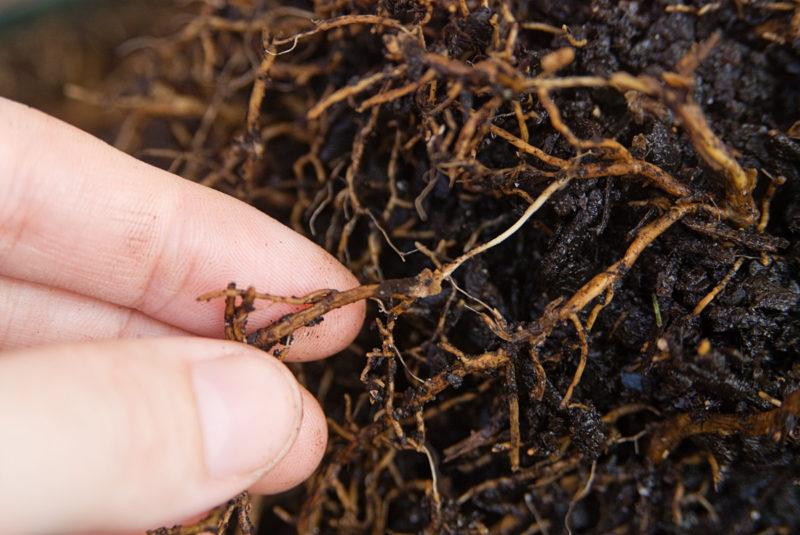 Diseases : Pythium and Phytophtora Root Rot
Root Rot, Pythium or Phytophthora occurs when soil moisture levels are excessively high and fungal spores present in the soil, come in contact with the susceptible plant. The base of stems discolor and shrink, and leaves further up the stalk wilt and die. Leaves near base are affected first. The roots will turn black and rot or break. This fungi can be introduced by using unsterilized soil mix or contaminated water.
Prevention and Control: Remove affected plants and their roots, and discard surrounding soil. Replace with plants that are not susceptible, and only use fresh, sterilised soil mix. Hold back on fertilizing too. Try not to over water plants and make sure that soil is well drained prior to planting. This fungus is not treatable by chemicals.
Rhizoctonia Root and Stem Rot symptoms look similar to Pythium Root Rot, but the Rhizoctonia fungus seems to thrive in well drained soils.
Pest : Scale Insects 
Scales are insects, related to mealybugs, that can be a problem on a wide variety of plants – indoor and outdoor. Young scales crawl until they find a good feeding site. The adult females then lose their legs and remain on a spot protected by its hard shell layer. They appear as bumps, often on the lower sides of leaves. They have piercing mouth parts that suck the sap out of plant tissue. Scales can weaken a plant leading to yellow foliage and leaf drop. They also produce a sweet substance called honeydew (coveted by ants) which can lead to an unattractive black surface fungal growth called sooty mold.
Prevention and Control: Once established they are hard to control. Isolate infested plants away from those that are not infested. Consult your local garden center professional for a recommendation regarding their control.
Diseases : Blight 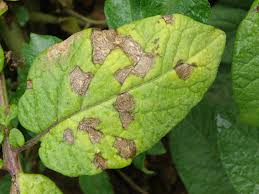
Blights are cause by fungi or bacteria that kill plant tissue. Symptoms often show up as the rapid spotting or wilting of foliage. There are many different blights, specific to various plants, each requiring a varied method of control.
Miscellaneous
Glossary : Specimen
A specimen can be a tree, shrub, ground cover, annual, or perennial that is unique in comparison to the surrounding plants. Uniqueness may be in color, form, texture, or size. By using only one specimen plant in a visual area, it can be showcased. Specimen plants are accents in the landscape, just as statues, water features, or arbors.
Glossary : Sandy Loam
Sandy Loam refers to a soil that drains well, with excellent air space, and evenly crumbled texture when squeezed in the hand. A good workable garden soil that benefits from added fertilizer and proper watering. Dark gray to gray-brown in color.
Glossary : Loam
Loam is the ideal soil, having the perfect balance between particle size, air space, organic matter and water holding capacity. It forms a nice ball when squeezed in the palm of the hand, but crumbles easily when lightly tapped with a finger. Rich color ranges between gray brown to almost black.
Glossary : Clayey Loam
Clayey loam refers to a soil that retains moisture well, without having a drainage problem. Fertility is high and texture good. Easily forms a ball when squeezed in the hand, and then crumbles easily with a quick tap of the finger. Considered an ideal soil. Usually a rich brown color.
Glossary : Tree
Tree: a woody perennial with a crown of branches that begin atop a single stem or trunk. The exception to this rule is multi-trunk trees, which some may argue are really very large shrubs.
Glossary : pH
pH, means the potential of Hydrogen, is the measure of alkalinity or acidity. In horticulture, pH refers to the pH of soil. The scale measures from 0, most acid, to 14, most alkaline. Seven is neutral. Most plants prefer a range between 5.5 and about 6.7, an acid range, but there are plenty of other plants that like soil more alkaline, or above 7. A pH of 7 is where the plant can most easily absorb the most nutrients in the soil. Some plants prefer more or less of certain nutrients, and therefore do better at a certain pH.
Glossary : Plant Characteristics
Plant characteristics define the plant, enabling a search that finds specific types of plants such as bulbs, trees, shrubs, grass, perennials, etc.
Glossary : Large Tree
A tree is considered large when it is over 30 feet tall.
Glossary : Foliage Characteristics
By searching foliage characteristics, you will have the opportunity to look for foliage with distinguishable features such as variegated leaves, aromatic foliage, or unusual texture, color or shape. This field will be most helpful to you if you are looking for accent plants. If you have no preference, leave this field blank to return a larger selection of plants.
Glossary : Soil Types
A soil type is defined by granule size, drainage, and amount of organic material in the soil. The three main soil types are sand, loam and clay. Sand has the largest particle size, no organic matter, little to no fertility, and drains rapidly. Clay, at the opposite end of the spectrum, has the smallest particle size, can be rich in organic matter, fertility and moisture, but is often unworkable because particles are held together too tightly, resulting in poor drainage when wet, or is brick-like when dry. The optimum soil type is loam, which is the happy median between sand and clay: It is high in organic matter, nutrient-rich, and has the perfect water holding capacity.
You will often hear loam referred to as a sandy loam (having more sand, yet still plenty of organic matter) or a clay loam (heavier on the clay, yet workable with good drainage.) The addition of organic matter to either sand or clay will result in a loamy soil. Still not sure if your soil is a sand, clay, or loam? Try this simple test. Squeeze a handfull of slightly moist, not wet, soil in your hand. If it forms a tight ball and does not fall apart when gently tapped with a finger, your soil is more than likely clay. If soil does not form a ball or crumbles before it is tapped, it is sand to very sandy loam. If soil forms a ball, then crumbles readily when lightly tapped, it’s a loam. Several quick, light taps could mean a clay loam.
Essential Guide To Lawn Care
No matter the size of your garden a healthy green lawn can make a children’s play area or a garden ‘carpet’. Yes they do take work but the rewards are worth it if you follow a few guidelines and don’t expect your grass to look like a bowling green!
In these times of water restrictions, lawns sometimes have to be left to ‘do it tough’, but by choosing a drought-hardy variety of turf, you can still have a turfed area that you’re proud to display.
Lawn foods
The best way to get your lawn ready for summer is to feed it in spring. It will not only look green it will also be stronger against diseases, patchiness, moss and weeds. It will also help toughen it up for the onslaught of activities it’s going to endure when the weather warms up.
As grass doesn’t flower, it needs a different type of fertiliser from other garden plants – it’s all about encouraging the ‘leaves’. And with so many fertilisers on the nursery shelves designed especially for lawns, it can be confusing to know what each one does and which is the product for you. But don’t worry, here we’ll explain what they do and how to choose what’s right for your lawn.
What’s what
Organic lawn foods include products like Yates Dynamic Lifter and Organic Life, as well as blood and bone. These are natural products based on ingredients such as animal manures, seaweed, rock minerals and fish and these tend to slowly feed the grass over a period of several months.
Synthetic granular fertilisers like Shirley’s No. 17 are chemical fertilisers which contain a mix of major and trace elements and are fast to green up the grass.
Combination fertilisers like Amgrow, Organix, Eco 88 and Munns Golf Course Green lawn fertiliser combine both organic and synthetic fertiliser ingredients in one product.
Slow release lawn foods include products like Scotts Lawn Builder, a granular fertiliser designed to release nutrients slowly.
Liquid hose-on fertilisers, such as Yates Liquid Evergreen Lawn Food and Garden King Nitrosol LiquidPlant Food are the fastest acting of all the fertilisers. While they don’t offer long term soil nutrition, they’re great for that quick green up just before a party!
Lawn chemistry
Whether you go organic, chemical, dry or liquid when choosing your lawn food, it’s really up to you. The important thing to understand is the N:P:K ratio and you’ll find that little chemical equation on the pack.
NPK is nothing complicated. The ‘N’ is for nitrogen – that gets the leaves green and growing. The ‘P’ is phosphorous, that’ll make the roots grow strong and deep. And the ‘K’ is for potassium, which helps the grass cope with drought and resist disease.
What’s important is the balance.
Some lawn foods that are nearly all nitrogen (like the old fashioned favourite sulphate of ammonia) will cause turf to green up suddenly, resulting in a massive growth spurt in a very short time, but not encouraging a strong root system. The problem with these types of ‘instant’ lawn foods is that after the first mowing, most of the nutrients have gone and the growth diminishes. Quite often, they cause such fast and tall growth, the lawn will look scalped and scathed after mowing and this is the perfect condition for new weed growth, so these quick fixes aren’t a good solution.
Instead, go for a balanced fertiliser which will encourage growth in all the right areas, both above and below ground. Look for an “all rounder” with an N:P:K ratio which is around 11 for nitrogen, 4 for phosphorus and 8 for potassium – slow and steady will definitely win this race. And remember that as long as you get that NPK balance right then the fertiliser you choose is up to you.
USEFUL TIPS
- If you like to apply different fertilisers in different seasons, use one that is higher in nitrogen in spring when the leaf growth is at its peak, and one that is higher in potassium in autumn to help toughen the grass for winter.
- If you do use the old method of applying sulphate of ammonia, make sure you apply an organic fertiliser the next time. Constant use of high nitrogen fertiliser will increase the acidity of the soil, which is not good for the natural soil balance – all the earthworms will head next door to fertilise your neighbour’s soil!
Expert’s recipe
Many gardeners have their own blend of tried and tested favourite fertilisers – and Graham Ross is no exception. Graham likes to use an application of an organic lawn food in autumn, to feed both the grass and the soil. Then in spring he applies a granular chemical fertiliser like Amgrow’s Shirley’s No. 17, to kick-start the lawn after winter and get it greened up in a hurry.
Applying lawn foods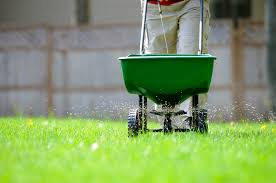
To get the very best results from lawn fertilisers, you need to apply them the right way. But before you start spreading, follow these preparation tips:
- If your soil is compacted, aerate the ground with a large garden fork to enable good penetration of the fertilisers. This is also good for water penetration.
- Remove large-leaved weeds before they set seed over summer and make a permanent home in your lawn. You don’t want your fertiliser to be feeding the weeds too. Cover bare patches of earth with some sand or lawn dressing to fill in the holes.
If your lawn is full of hard-to-remove weeds, try using a fertiliser that also contains a herbicide such as YatesWeed ‘n’ Feed or Osmocote Lawn Builder with Weedkill. But make sure it is suitable for use on the type of grass you have. Some herbicides will also kill buffalo lawns so, as always with chemicals, read the label first.
Spread with care
Plan your route around the garden so that you don’t double up on fertiliser as this will burn the grass. Set up a simple string line or lay out the hose in a line to guide you over the lawn. To be sure all the ground is covered, many gardeners apply half the fertiliser in horizontal rows and the other half in vertical rows.
Another approach is to measure up your lawn, then divide the area into quarters. Then mark off your fertiliser container in quarters as well (you’ll need to have the correct quantity of lawn food in the container). Start spreading fertiliser over the first quarter of the lawn, then when the first quarter of the container is gone move onto the next. Simple.
For the most even distribution of granular or powdered fertiliser, use a spreader. These range in price from around $20 for a hand held one to $245 for a larger version with wheels, designed for big areas. Ask at your local nursery or shop on line at www.gardenexpress.com.au or www.gardensonline.com.au. Alternatively you can improvise by using an old plastic pot with drainage holes as a shaker.
TIP: Be aware that some of the organic fertilisers can be quite smelly, so plan to fertilise well before a social gathering!
Water Wisely. The ideal time to fertilise a lawn is after good rainfall when the soil is wet. Some fertilisers may instruct you to water before application, whilst others will instruct that you should water after. Always follow the instructions.
Some lawn fertilisers such as Maxicrop Lawn Rejuvenator Granules include extra goodies such as wetting agents, which help the soil to absorb and hold moisture. Alternatively, you can buy wetting agents separately and add at the time of fertilising.
Spring lawn care Keep your lawn looking good all year round by following the basic maintenance routine. These tasks are usually performed during early spring, just before the main growing season kicks in, but you can also perform them in autumn too. And the winter months are a good time to be on weed patrol.
Thatch removal
If your lawn feels spongy under foot, the chances are its got a build-up of thatch, particularly with buffalo, couch and kikuyu lawns. ‘Thatch’ is the layer of dead grass that lies above the soil and root system – it can stop air and moisture reaching the roots and encourages fungal disease.
To remove, hire a de-thatcher or scarifier from an equipment hire outlet such as McEntee Hire. These tools cut through and remove unwanted material (but aren’t recommended on buffalo grass lawns). For smaller areas, use a metal-tined rake to remove the excess thatch and avoid over fertilising as this can cause thatch build-up.
Over time, all lawns build up a layer of dead grass, or thatch, at their base. Here are the steps to take:
‘Core’ your soil
Walking, playing or parking your car on the lawn can cause the soil to become compacted. Water then can’t soak through, and air can’t circulate – it’s particularly a problem with clay-based soils.
To de-compact the lawn, hire a corer or hollow tine machine or, for small areas, use a large garden fork and work your way across the lawn. Mechanical corers have hollow prongs that extract plugs of soil, leaving long holes called cores. When dry, use a lawn leveller to rake the crumbled cores back into the lawn. Alternatively fill the holes with sand or sandy loam.
Getting dressed
Top-dressing is really only used to level a lawn or fill in any bald or damaged patches. Use a sandy loam, or a specific soil mix recommended by a local nursery, turf or landscape supplier. Cover affected areas by no more than 1 cm. Use a rake to spread the mix, then water in well.
As humus-rich soils hold more moisture, top dressing is best done in spring rather than autumn.
Sweet or sour?
Every year or two, test the pH of your soil. Lawn soil should be slightly acidic (or sour) and there’s an easy way to check the level by using a pH kit. This measures on a scale of 1-14 the state of the soil, with 7 being neutral, 1 being very acidic and 14 being highly alkaline (sweet). The pH for lawns should be slightly acidic, ideally around 6-6.5.
So how do you correct it?
On acidic lawns (below 5.5) spread garden lime or dolomite, following the directions on the bag, and water in well. If the soil is too alkaline (over 7) spread sulphate of ammonia – again to the manufacturer’s instructions. Soil pH test kits can be bought from nurseries.
Test your soil before fertilizing to make sure the ingredients can be absorbed by the soil. If the balance is out, the goodies won’t get to where they’re needed.
Year-round Maintenance Short cuts
Mow your lawn according to the rate of its growth and don’t remove more than one third of its height each time. Mowing too often will just give you extra work and may weaken your lawn. To avoid scalping the grass, which can cause root burn, keep the mower blades high. Thick, vigorous and healthy grass can compete with weeds and suppress them.
Weeding out weeds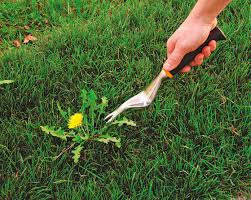
The best fight against weeds is a healthy lawn but if you have problems, talk with your local nursery about chemical products. You can remove lawn weeds by hand (roots and all) or by applying a selective lawn herbicide – these kill the weeds but not the grass. Moss will often grow in areas that are poorly drained so grab a garden fork and aerate the soil, then rake out and collect the moss with a wire rake. Sulphate of iron is also sold as a moss treatment.
Watering
Learn to reduce the moisture needs of your lawn by not over fertilising, and not mowing it too short, which causes stress. And to improve water penetration, apply a wetting agent and keep it well aerated by coring at least once a year.
Finally, you can still water your lawn, as long as you follow the restrictions in place in your area. Generally, this involves using a hand-held hose or a watering can and in some areas, using a sub-surface irrigation system on certain days. Always check with your local water authority.
For all of your gardening and landscaping needs call Jim’s Mowing on 0800 454 654 or book online today!


